For more detail this asset from the Unity Asset Store: Click Here
This is a paid asset, but now you can download UBER – Standard Shader Ultra for FREE, Please keep in mind this package is provided only for learning purposes or to be able to test before buying the product, NOT FOR COMMERCIAL PURPOSES.
UBER – Standard Shader Ultra v1.2h (Latest version)
UBER – Standard Shader Ultra v1.2g
“If possible, please buy the package to support the developer”
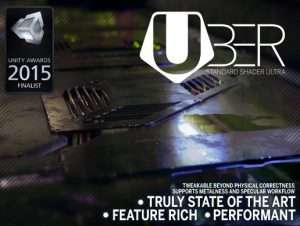
Standard Shader on steroids ?
That’s what UBER is all about:
Forum & demos | Documentation PDF
Most prominent features are:
– Various Parallax techniques (full Z-Write!)
– Tessellation variants
– Refraction with chromatic aberration
– Translucency (based on DICE’s model)
– Dynamic weather (snow/rain)
– Triplanar selective (fast approach)
– Vertex blend painting (2 layers mode)
– Well sorted out and clean interface
– Fully configurable vertex color usage
– Presets functionality
– Works with Alloy lighting (deferred)
Package requires SM3.0 GPU (DX9).
SM5.0 (DX11, OGL4) for tessellation and better performance is preferred.
UBER – Standard Shader Ultra. As the name suggests it’s based on Unity’s Standard Shaders principles and uses standard PBR lighting implementation. On the top of the Standard Shader I’ve added a lot of new features that can enahance your visual output dramatically. Mainly they are based on very advanced POM (Parallax Occlusion Mapping) techniques that give impression of extruded surfaces without neccessity to use complex geometries or tessellation. Although tessellation is also implemented (displacement & Phong smoothing), your output platform doesn’t need to handle it. For some class of objects it’s even better to use parallax occlusion mapping instead of tessellation. Together with enhanced detail mapping UBER will provide you with fast approximate translucency model, dynamic snow with glitter, dynamic water that flows down the slopes of your mesh and more. Every shader included has set of “core” functionalities and the difference between shaders are basically based on their tessellation/parallax technique and optional refraction. Shaders are configurable for their vertex color usage which can control many aspects of your model from detail/snow/water masks thru AO baked or colorization of diffuse output. Not only shaders are provided by the package but also a lot of other helpful systems like global weather script can influence all scene objects at once with only a few physical parameters like fall intensity, temperature and the script will adjust water/snow values on the objects for you. Installation of package is very straightforward. After importing it you’ll see 2 subpackages inside – install them in the provided order. Disable MSAA (GPU antialiasing) in Unity quality settings to not break HDR rendering in forward lighting mode (example scene might not looking good then). Change your color model to Linear for best PBR experience as well.
Basics and UBER core functionality After installation you can go to example scene and look around there are a few objects that have UBER shader used and properly setup for rendering. Let’s start with the basic functionalities that I’ll describe section by section. They are depicted in colored boxes in shader material inspector. Some of them are optional in the shader and you can select the feature by checkbox at the left side of section. Examples are – POM, Snow, Water, Translucency, Glitter. Some sections are persistent and available in all shaders like Presets, Main Maps. Other sections are shader variant dependent (for example parameters specific to refraction, tessellation).
Main Maps Let’s consider material that’s attached to POM Box Z-write game object example. It has Core shader selected from UBER – Specular Setup shader dropdown folder. As we see it’s very similar to what you’re familiar with – Unity Standard Shader. I’ve selected Albedo map which stores the base color of the object in (RGB) channels. The difference is Ambient Occlusion storage. Instead of opacity, (A) channel of the albedo texture in UBER holds Ambient Occlusion which is controlled by Occlusion slider. That’s the case when Occlusion map texture seen at the bottom of the section is empty. If it’s not empty occlusion is taken from this dedicated map. The same for transparent rendering modes (topmost dropdown in inspector). Transparent modes store opacity in Alpha channel of Albedo texture so it would interfere and occlusion is taken from dedicated Occlusion map texture then as well. In this case (A) channel of the texture attached to Albedo doesn’t have occlusion data so I set the occlusion slider value to 0.
Color selector next to the Albedo map is always visible and is always used. (RGB) of the color is multiplied by Albedo texture (RGB) – you can always use albedo texture color tinting. Color picker is HDR, so in case your albedo texture is dark you can boost it to bright value with HDR tint. Keep tint color white to not influence albedo texture. In case of transparent rendering modes (A) value of color multiplies transparency value taken from texture (A) channel. Diffuse scattering color can boost albedo color output visible at Fresnel/grazing view angles. It’s also known as “peach fuzz effect”. Useful for plenty of applications like velvet fabrics or gentle dust on the surface. Keep the color (RGB) black to turn off the feature. When (A) of the scattering color is zero UBER will multiply albedo color by diffuse scattering color (x4 for higher range). When your albedo is – 5 of 37 – Table of contents black it would do nothing (as tinting black color does nothing). That’s the case you can use (A) of scattering color. When it’s 1 we actually don’t multiply color but use scattering color (RGB) instead (x4). Exponent and offset sliders control falloff of the effect. Specular map texture is like you know it in Unity’s Standard Shader. (RGB) is specular color while (A) is smoothness (gloss). For metallic setup R channel would control metalness. Specular color (metalness slider in metallic setup) is always used and works as “PBR tint”. You need to remember setting spec color tint to white to get unaffected value from texture. The same for metalic setup – set metalness, smoothness to 1 to take unaffected values from specifed metalness/gloss texture. When your spec/metal + smoothness texture has filename with _Gloss suffix it will be automatically processed by UBER texture importer. It improves equalization of specularity so that average amount of specular energy (brightness) stays the same for subsequent MIP level of smoothness map. Additionally if your normalmap name has the same prefix as spec/gloss map but has _Normal suffix UBER will try to incorporte variance into MIP smoothness levels. It can improve the look of shiny surfaces that have small hi-frequency details on it. Without filtering with variance you could experience either “huge mirrors” effect far away like described in Black-Ops tech PBR paper or noisy jittering upclose. Remember to make normalmaps read/write enabled before reimporting spec/gloss maps before. After import and baking variance into smothness data you can set back read/write enabled flag to none. New to UBER is very handy ranging feature – Smooth min/Smooth max sliders. When you keep it default (0, 1) smoothness works like in Unity. But often your smoothness is not calibrated the way you like. Correcting this would mean work again in imaging software which is time consuming – going back and forth to Photoshop/Unity to realize that most glossy parts of the texture are too glossy or most rough parts are too rough… With the sliders you can range output smoothness. Where your gloss value from texture is 0 – value of Smooth min will be output. Where your gloss from texture is 1 – Smooth max is taken. Values in-between are interpolated. So – if your smoothness map is normalized (0..1) – you can simply select range on the sliders to 0.2 – 0.7 and output gloss will be mapped to this range (most rough parts will have 0.2 smoothness output, most glossy parts will have 0.7 output). You can even invert gloss range – select 1, 0 for sliders (instead of 0, 1) and your most glossy parts will become most rough and vice versa. Normal map is self-explaining and works like in Standard Shader. Height map is used for parallax displacement effects and for wet effects. When POM (Parallax Occlusion Mapping) feature is disabled – default PM (Parallax Mapping) is used and slider on the right side of map is present to control parallax displacenet. In above case (POM Box Z-write game object example) POM is turned on and displacement amount is controlled separately in POM section described in the next chapter. Occlusion map is used like in Standard Shader – when it’s filled by texture, its G color value is used to control AO effect. This map stores also mask for translucency and glitter effect (B). For 2 layers shader variant all layers are used (RG for 1st layer, BA for 2nd to control AO and translucency/glitter). Look at ear game object example – map with AO and translucency mask (with veins baked) is used. For ambient occlusion we can also use secondary mask. It’s the case when UV coords are selected to be UV1.


